To add a new Customer or Vendor:
- Go to the Accounts tab.
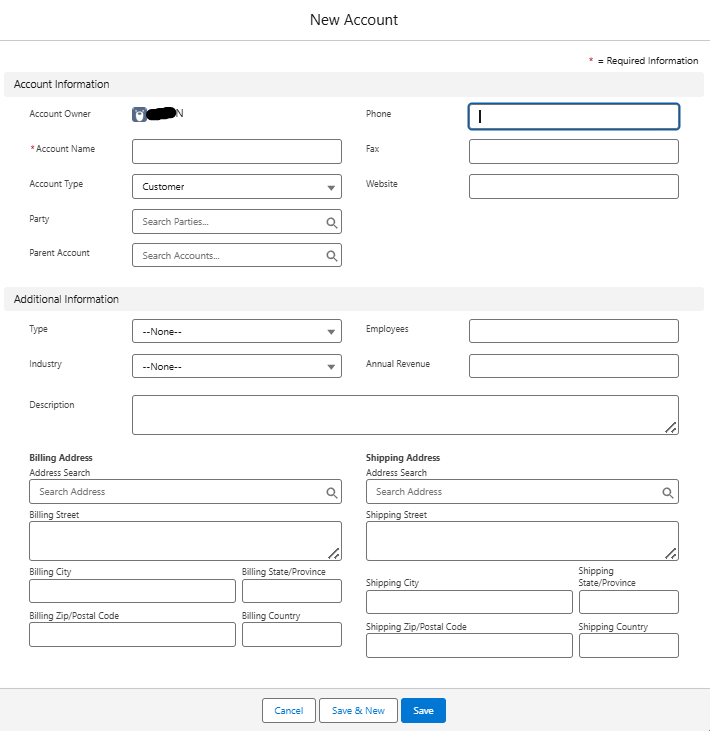
- Click New in the top-right corner.
- Fill in the customer details in the form.
Field | Description |
| Account Name | Full legal name of the Account |
| Account Type | Customer, Vendor or Customer & Vendor |
| Email / Phone / Fax / Website | Contact details |
| Additional Information | Type, Industry, Employees, Annual Revenue |
| Billing and Shipping Address | Billing and shipping address |
| Tax Registration No | GSTIN, VAT, or similar (if applicable) |
| Payment Terms | e.g., Net 15, Net 30, Advance |
- Click Save.
Once created, you can create purchase orders, sales orders, and work orders against the customer or vendor.
You can also import account records in bulk by clicking the Import button in the Accounts tab and following the upload steps using a supported file format like CSV or Excel.
You can also perform the following actions on existing records:
Create Contact / Case / Note / Opportunity:
Select an account and click the corresponding New Contact, New Case, New Note, or New Opportunity button. Fill in details and save.
Edit Account:
You can update existing account details by selecting the account, clicking Edit, making changes, and saving.
Delete Account:
You can remove an account permanently by selecting it and clicking the Delete button.
Change Account Owner:
You can transfer ownership of an account to another user by using the Change Owner option.
View Account Hierarchy:
You can visualize the relationship between parent and child accounts by clicking View Account Hierarchy.
Mark Account as Inactive:
If an account is no longer active, you can uncheck the Active status to mark it as inactive.
Was this article helpful?
That’s Great!
Thank you for your feedback
Sorry! We couldn't be helpful
Thank you for your feedback
Feedback sent
We appreciate your effort and will try to fix the article